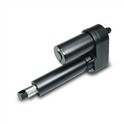
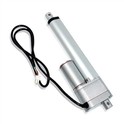
Hey there! I'm a supplier of Mini Linear Actuators, and I know how important it is to keep these little powerhouses in tip - top shape. A well - maintained Mini Linear Actuator not only lasts longer but also performs better. In this blog, I'll walk you through the steps on how to clean a Mini Linear Actuator.
Why Cleaning is Crucial
First off, let's talk about why cleaning your Mini Linear Actuator is so important. Over time, dust, dirt, and debris can accumulate on the actuator. This build - up can cause all sorts of problems. It can increase friction, which means the actuator has to work harder to move. That extra strain can lead to premature wear and tear on the components, reducing the actuator's lifespan. Also, dirt can get into the moving parts and cause jams, making the actuator less reliable.
Tools You'll Need
Before you start cleaning, gather the necessary tools. You'll need a soft, lint - free cloth. This is important because you don't want any fibers getting stuck in the actuator. A can of compressed air is also a great tool. It can help blow out dust from hard - to - reach areas. If there are stubborn stains or grease, you might need a mild cleaning solution. Make sure it's non - abrasive and won't damage the actuator's surface. You can use a small brush with soft bristles, like a toothbrush, to gently scrub the parts.
Step 1: Power Off and Disconnect
Safety first! Before you start cleaning, make sure the Mini Linear Actuator is powered off and disconnected from any power source. This prevents any accidental movement that could cause injury. You don't want your fingers getting pinched or any other mishaps.
Step 2: Remove Loose Debris
Use the can of compressed air to blow away any loose dust and debris from the actuator. Hold the can upright and keep a safe distance from the actuator to avoid causing any damage. Start from the top and work your way down, paying special attention to the crevices and openings. The compressed air can reach places that your cloth or brush might not be able to.
Step 3: Wipe Down the Exterior
Take your soft, lint - free cloth and dampen it slightly with the mild cleaning solution if needed. Gently wipe the exterior of the actuator. Make sure to clean all the surfaces, including the housing and the rod. Be careful not to get any liquid inside the actuator. If there are any labels or markings, try to avoid rubbing them too hard to prevent them from fading.
Step 4: Clean the Moving Parts
If possible, extend and retract the actuator slightly to expose more of the moving parts. Use the soft - bristled brush to gently clean these parts. You can also use the cloth to wipe them down. Be very gentle when cleaning the moving parts because they are delicate. If you notice any signs of excessive wear or damage, it might be time to replace the parts. You can check out our High Speed Linear Actuator for high - performance replacement options.


Step 5: Check the Electrical Connections
Inspect the electrical connections of the Mini Linear Actuator. Make sure they are clean and free of corrosion. If there is any corrosion, you can use a small amount of electrical contact cleaner to clean the connections. After cleaning, dry the connections thoroughly before reconnecting them.
Step 6: Lubrication (Optional)
Some Mini Linear Actuators might require lubrication. Check the manufacturer's instructions to see if your actuator needs it. If so, use a lubricant recommended by the manufacturer. Apply a small amount of lubricant to the moving parts, following the instructions carefully. Too much lubricant can attract more dust and dirt, so use it sparingly.
Step 7: Reassemble and Test
Once you've finished cleaning and lubricating (if necessary), reassemble the actuator if you had to take any parts apart. Make sure everything is properly connected and tightened. Then, reconnect the power source and test the actuator. Make sure it moves smoothly and there are no unusual noises or vibrations.
Special Considerations
- Environment: If the Mini Linear Actuator is used in a harsh environment, like a factory with a lot of dust or a place with high humidity, you might need to clean it more frequently.
- Usage: If the actuator is used intensively, it might also require more regular cleaning. For example, if it's part of a Linear Actuator for Standing Desk that's adjusted multiple times a day, it could accumulate more dirt.
Maintaining a Cleaning Schedule
To keep your Mini Linear Actuator in good condition, it's a good idea to set up a cleaning schedule. Depending on the usage and environment, you might need to clean it once a month, once every few months, or even more often. Regular cleaning can save you a lot of money in the long run by preventing costly repairs or replacements.
Conclusion
Cleaning a Mini Linear Actuator isn't that difficult, but it does require some attention to detail. By following these steps, you can keep your actuator running smoothly and extend its lifespan. If you have any questions about cleaning or need help choosing the right Mini Linear Actuator for your project, feel free to reach out. We offer a wide range of Mini Linear Actuators, including 12V Linear Actuator options. Whether you're a DIY enthusiast or a professional in the industry, we're here to help. If you're interested in purchasing our Mini Linear Actuators or have any procurement - related questions, don't hesitate to contact us. We're always ready to have a discussion about your needs and find the best solutions for you.
References
- Manufacturer's manuals for Mini Linear Actuators
- Industry best practices for actuator maintenance


