As a supplier of Cabinet Gas Dampers, I often receive inquiries from customers about the maintenance and cleaning of these essential components. A well - maintained cabinet gas damper not only ensures smooth operation but also extends its lifespan. In this blog, I'll share some practical steps on how to clean a cabinet gas damper.
Why Cleaning is Necessary
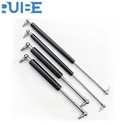
Cabinet gas dampers are constantly exposed to dust, dirt, and sometimes even moisture. Over time, these contaminants can accumulate on the damper's surface and inside its moving parts. Dust can cause friction, which may slow down the damper's operation or even lead to jams. Moisture, on the other hand, can cause rust and corrosion, weakening the damper's structure and reducing its functionality. Regular cleaning can prevent these issues, keeping your cabinet gas dampers in top - notch condition.
Tools and Materials You'll Need
Before you start cleaning, gather the necessary tools and materials. You'll need a soft microfiber cloth, a mild detergent, a small brush (such as an old toothbrush), and a can of compressed air. The microfiber cloth is gentle enough not to scratch the damper's surface, while the mild detergent can effectively remove dirt and grime. The small brush can reach into the hard - to - reach areas, and the compressed air can blow out any loose dust particles.
Step - by - Step Cleaning Process
Step 1: Safety First
Before you begin cleaning, make sure the cabinet is empty or at least the items inside are secured. If the gas damper is attached to a heavy cabinet door, you may want to use a support to hold the door open to prevent it from accidentally closing during the cleaning process. This will protect you from potential injuries and also make the cleaning process more convenient.
Step 2: Remove the Gas Damper
If possible, remove the gas damper from the cabinet. Most cabinet gas dampers are attached with screws or clips. Use the appropriate tools to carefully detach the damper from the cabinet door and the cabinet frame. This will allow you to clean all parts of the damper more thoroughly. However, if you're not confident in removing the damper, you can also clean it while it's still attached, but you may have limited access to some areas.
Step 3: Wipe the Surface
Take the soft microfiber cloth and dampen it with a small amount of mild detergent and water solution. Gently wipe the outer surface of the gas damper to remove any visible dust, dirt, or stains. Pay special attention to the areas around the joints and the piston rod. These areas are more likely to accumulate dirt due to the movement of the damper. Make sure to wring out the cloth well so that it's not too wet, as excessive moisture can damage the damper.
Step 4: Clean the Moving Parts
Use the small brush to clean the moving parts of the gas damper, such as the piston and the cylinder. Dip the brush in the detergent solution and gently scrub the parts to remove any stubborn dirt or debris. Be careful not to apply too much pressure, as this could damage the delicate components of the damper. You can also use the can of compressed air to blow out any loose particles that may be stuck in the small crevices.
Step 5: Rinse and Dry
After cleaning, rinse the gas damper with clean water to remove any remaining detergent. Use a dry microfiber cloth to pat the damper dry thoroughly. Make sure there is no moisture left on the damper, especially inside the cylinder and around the piston. Moisture can lead to rust and corrosion, which will significantly reduce the damper's performance and lifespan.
Step 6: Reinstall the Gas Damper
Once the gas damper is completely dry, reinstall it back to the cabinet. Make sure it is properly aligned and securely attached. Test the cabinet door to ensure that the damper is working smoothly. If the door doesn't close or open as it should, double - check the installation to make sure everything is in place.
Maintenance Tips
In addition to regular cleaning, there are some other maintenance tips that can help keep your cabinet gas dampers in good condition. Avoid exposing the dampers to extreme temperatures or harsh chemicals, as these can damage the materials. Lubricate the moving parts of the damper occasionally with a silicone - based lubricant to reduce friction and ensure smooth operation. Check the dampers regularly for any signs of wear and tear, such as leaks or cracks. If you notice any issues, it's best to replace the damper as soon as possible to prevent further damage.
Related Products
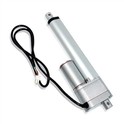
If you're interested in other types of gas dampers, we also offer Gas Damper for Car. These gas dampers are designed to meet the specific requirements of automotive applications, providing reliable damping performance. And of course, our Cabinet Gas Damper is available in a variety of sizes and specifications to suit different cabinet designs.
Contact Us for Purchasing
If you're in need of high - quality cabinet gas dampers or have any questions about our products, feel free to contact us. We're a professional supplier with years of experience in the industry, and we're committed to providing our customers with the best products and services. Whether you're a small business owner looking for a few dampers or a large - scale manufacturer in need of bulk orders, we can meet your requirements.


References
- "Gas Spring Handbook" by Suspa
- Industry standards and guidelines for gas dampers in cabinet manufacturing.